
I wrote this a while back but it’s still useful.
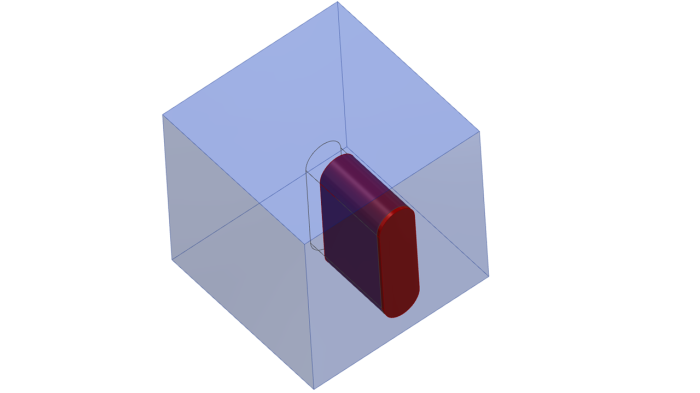
Tutorial to show adding a mortise & a tenon with a dowel hole at the same time. The Timber size that the joint will attach onto is 50×50.
Step 1 – Sketch a rectangle 50x50mm about the sketch origin.
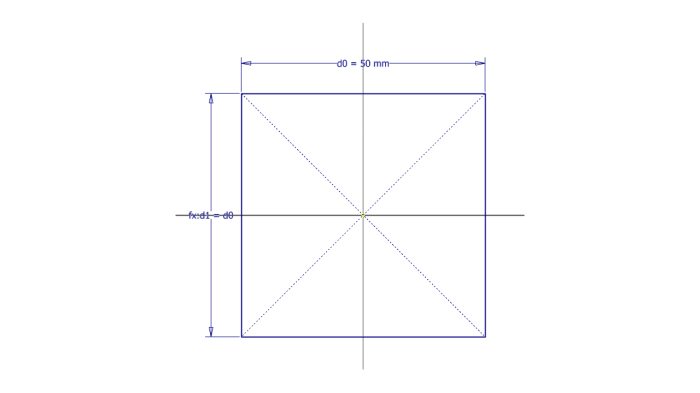
Step 2 – Extrude the rectangle symmetrically about the work plane 50mm

Step 3 – Create a new sketch on a side face and draw a slot as below, you can use the slot tool or draw your own if you want the practice. Make sure you key the parameters Mortise_Width = 10mm, Mortise_Height = 35mm and Mortise_Height / 2ul for half the height.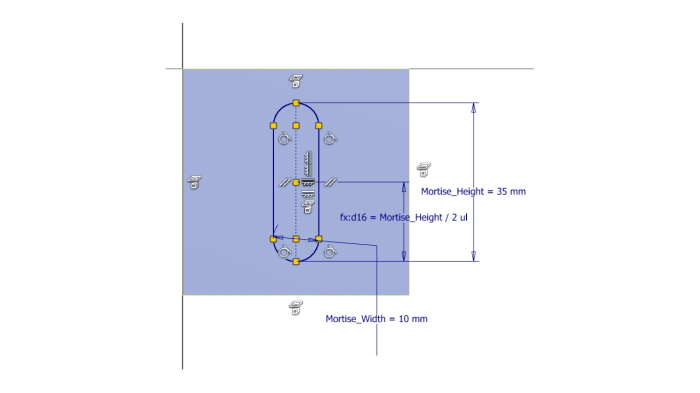
Step 4 – With a fully constrained sketch, you can Extrude the slot into the block 25mm but make sure you select New Solid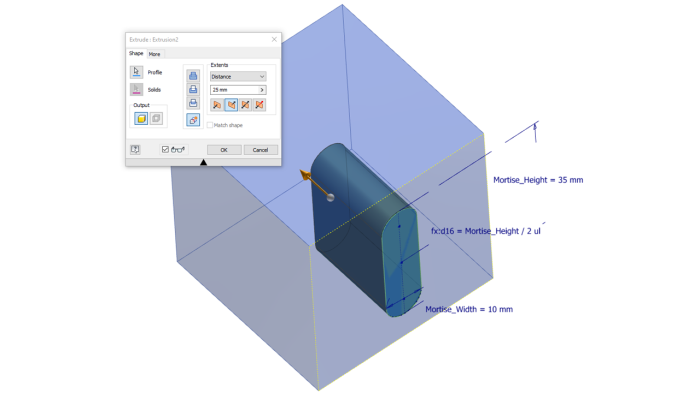
Before you select OK, you need to change the Extents Extrude to Asymmetric and have 1mm of the slot come out of the block as below. This 1mm will be joined to the mating timber and will be consumed into the part so you won’t see it.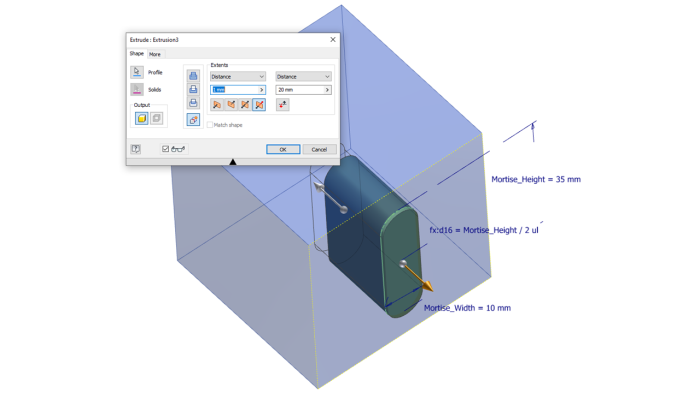
Select OK
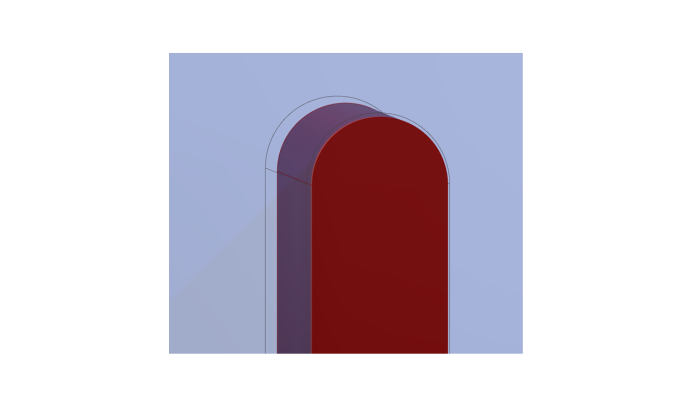
Step 5 – Now we are going to add some clearance around the joint. Use Thicken & offset 0.25mm cutting into the part.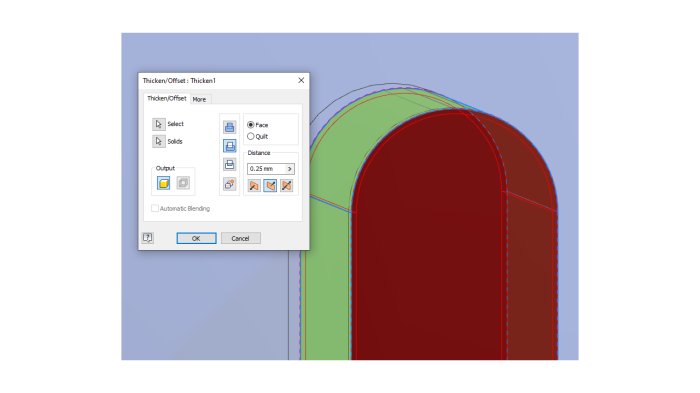
The Joint should be slightly smaller.
Step 6 – We now need to duplicate the work and create a second joint feature so sketch out the profile as before in Step 3.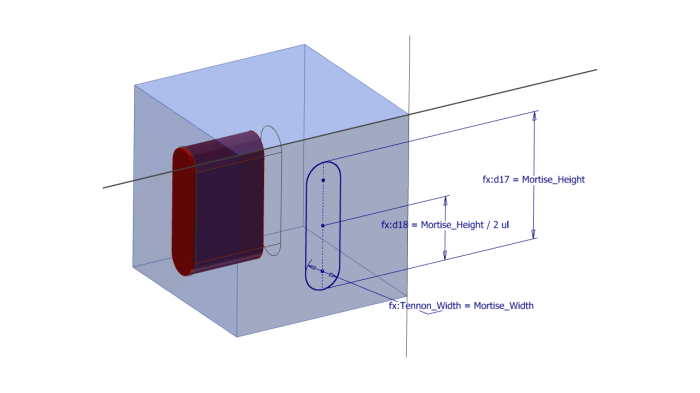
Step 7 – Extrude the joint, but switch to asymmetric extrusion.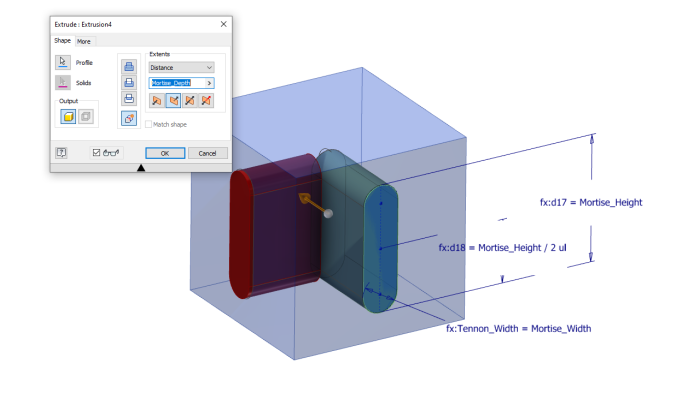
Set distance 1 to Tennon_Depth & distance 2 can protrude the 1mm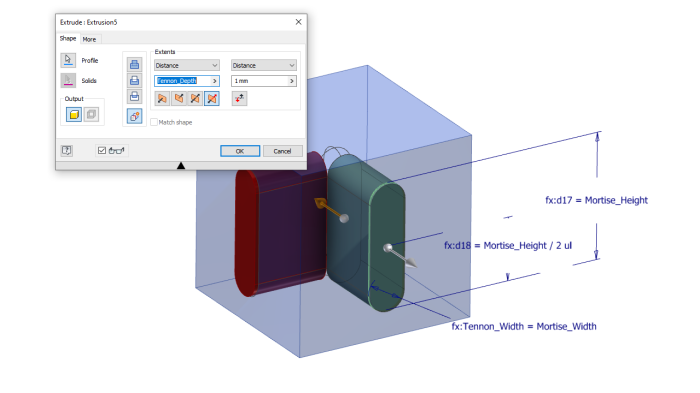
Step 8 – Now again, Thicken as before 0.25, cutting into the joint. 
Step 9 – Create a sketch for the dowel hole which in this case I have just used a circle. You could use the hole command if you prefer. Dowel_Dia = 6.35mm, positioned 12mm x 6mm as below.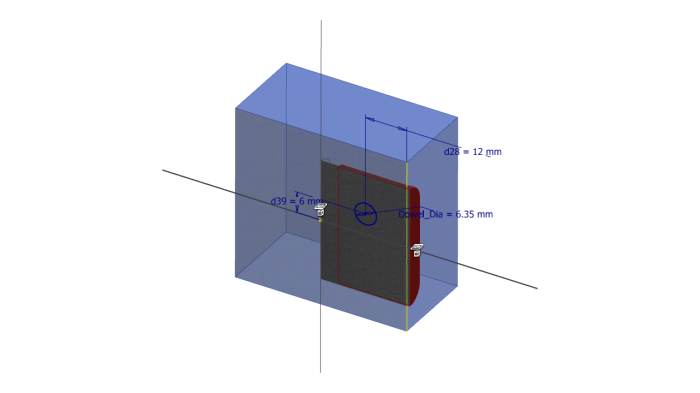
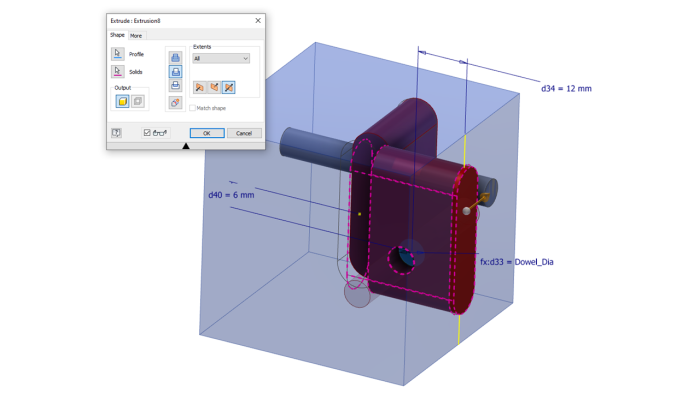
Step 10 – Now Extrude and cut through the joint.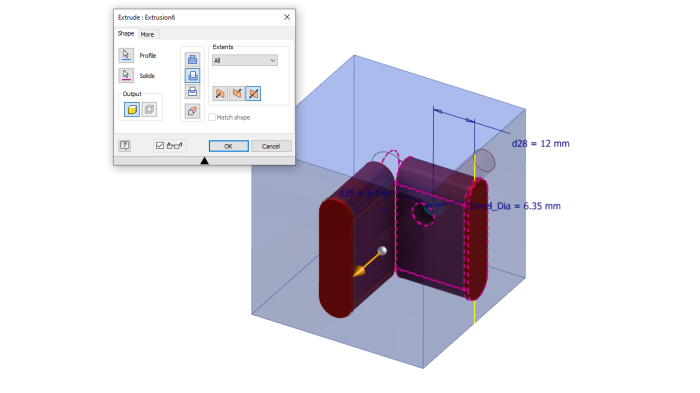
Step 11 – Create the Dowel. Share the sketch & create another extrusion between the two faces shown below. Make sure you select new solid.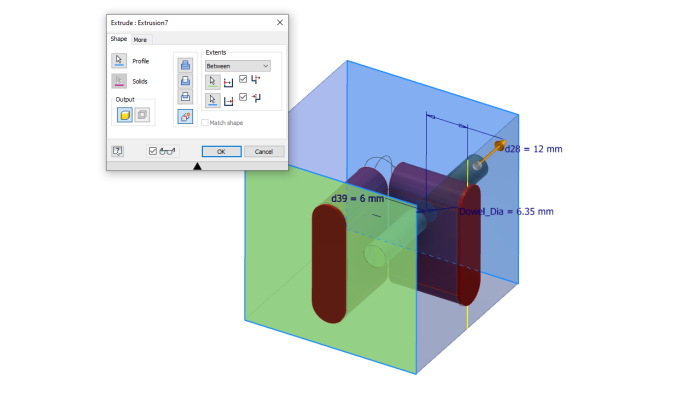
The first Dowel is created.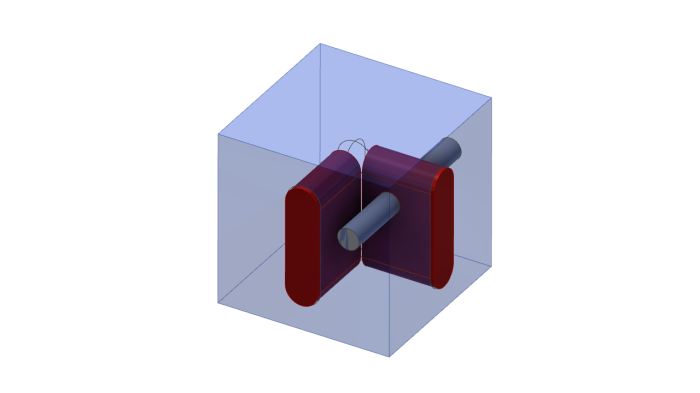
Step 12 – Repeat the dowel hole creation as per Steps 9 – 11 for the other joint.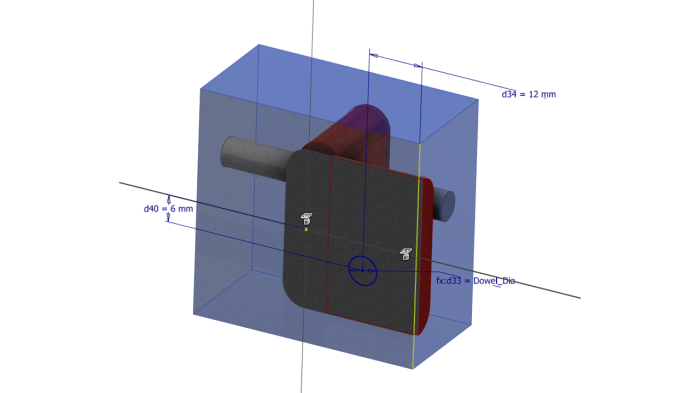

Finally you will have a single corner Joint which can be placed in your assembly.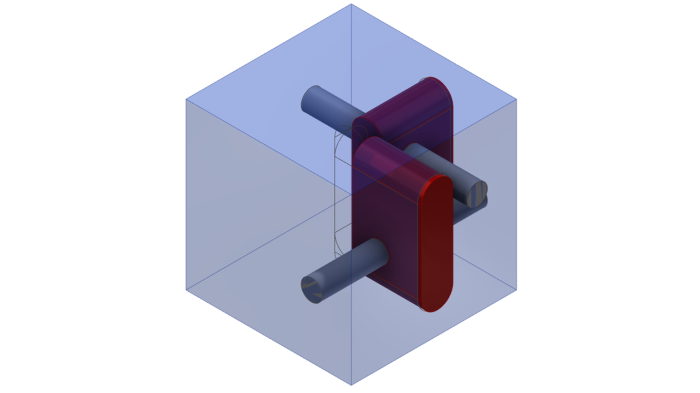
Finally you need to add the Woodwork for Inventor intelligence to allow the sculpt tool to work. Simply name your solid bodies.
+ = Add material
– = Subtract Material

You could assign iMates to pre-define how this will be assembled or you could setup the four corners and place within an assembly. I have uploaded a copy of the joints for download which will work with Inventor 2019 upwards.
Don’t forget to make your assembly Flexible before placing!
